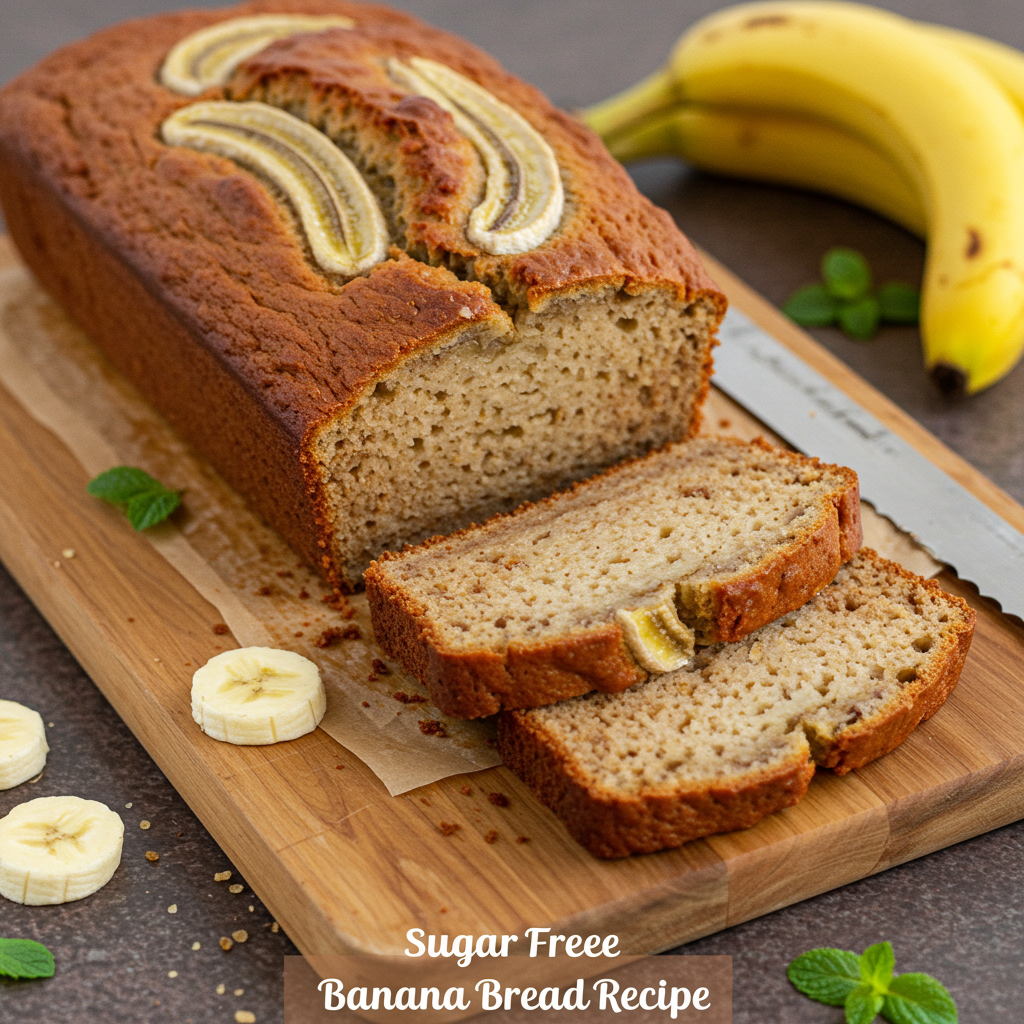
Welcome to Your New Favorite Sugar-Free Treat!
Are you craving a warm, comforting slice of banana bread but trying to cut down on sugar? Look no further! This Sugar Free Banana Bread Recipe is your ticket to guilt-free indulgence, proving that healthy can be incredibly delicious. Perfect for those new to baking, this recipe focuses on simplicity, clear instructions, and consistently delicious results. We believe that easy baking recipes should be accessible to everyone, and that’s why we’ve packed this post with all the essential baking tips for beginners you’ll need to succeed. Get ready to transform those ripe, spotty bananas into a moist, flavorful loaf that will quickly become a staple in your kitchen. No fancy techniques, just pure baking joy awaits!
Ingredients You’ll Need
Gathering your ingredients before you start is a crucial first step for any beginner baker. It helps ensure a smooth process and prevents mid-recipe panic! Here’s what you’ll need for your delicious sugar-free banana bread:
| Quantity | Unit | Ingredient |
|---|---|---|
| 3 | large | Very ripe bananas (mashed, about 1 cup) |
| 1/2 | cup | Unsalted butter, melted |
| 1/2 | cup | Granular sugar substitute (e.g., erythritol, stevia blend suitable for baking) |
| 1 | large | Egg |
| 1 | teaspoon | Vanilla extract |
| 1 1/2 | cups | All-purpose flour |
| 1 | teaspoon | Baking soda |
| 1/2 | teaspoon | Salt |
| 1/2 | teaspoon | Ground cinnamon (optional) |
| 1/4 | cup | Chopped walnuts or pecans (optional, for crunch) |
Step-by-Step Instructions: Your Guide to Perfect Banana Bread
Follow these detailed steps, and you’ll be enjoying warm, homemade banana bread in no time. Don’t worry if it’s your first time; we’ll walk you through everything!
Step 1: Preheat and Prepare Your Pan
First things first! Preheat your oven to 350°F (175°C). This ensures your oven is at the correct temperature when your batter is ready, leading to even baking. Next, take a standard 9×5-inch loaf pan. Lightly grease it with butter, cooking spray, or line it with parchment paper, leaving an overhang on the long sides. This makes it super easy to lift the bread out once it’s baked and cooled – a common beginner mistake is forgetting this step, leading to stuck bread!
Step 2: Mash the Bananas
In a medium-sized mixing bowl, peel your three very ripe bananas. Use a fork or a potato masher to mash them until mostly smooth. A few small lumps are perfectly fine and add lovely texture to your bread. Beginner tip: The riper the bananas (with lots of brown spots), the sweeter and more flavorful your bread will be. They also mash much more easily!
Step 3: Combine Wet Ingredients
To the mashed bananas, add the 1/2 cup of melted unsalted butter, 1/2 cup of granular sugar substitute, 1 large egg, and 1 teaspoon of vanilla extract. Stir everything together with a whisk or spatula until well combined. This is your “wet” mixture. Make sure the butter isn’t too hot, or it could start to cook the egg!
Step 4: Mix Dry Ingredients
In a separate, larger mixing bowl, whisk together the 1 1/2 cups of all-purpose flour, 1 teaspoon of baking soda, 1/2 teaspoon of salt, and the optional 1/2 teaspoon of ground cinnamon. Whisking ensures these dry ingredients are evenly distributed, which is important for the bread’s texture and rise. Beginner tip: When measuring flour, spoon it into your measuring cup and then level it off with a straight edge (like a knife). Don’t scoop directly from the bag, as this can compact the flour and lead to too much flour, resulting in dry bread.
Step 5: Combine Wet and Dry Mixtures
Pour the wet banana mixture into the bowl with the dry ingredients. Using a spatula, gently fold the ingredients together until they are just combined. A few streaks of flour are okay! This is a critical beginner tip: Do NOT overmix! Overmixing develops the gluten in the flour too much, which can make your banana bread tough and chewy instead of moist and tender. If you’re adding optional chopped walnuts or pecans, fold them in now.
Step 6: Pour into Pan and Bake
Pour the batter evenly into your prepared loaf pan. You can tap the pan gently on the counter a couple of times to settle the batter and remove any large air bubbles. Place the pan in your preheated oven. Bake for approximately 50-65 minutes. Baking times can vary depending on your oven.
Step 7: Check for Doneness
Around the 50-minute mark, check your banana bread. Insert a wooden skewer or toothpick into the center of the loaf. If it comes out clean or with just a few moist crumbs attached, your bread is done! If it comes out with wet batter, continue baking for another 5-10 minutes and check again. If the top is browning too quickly, you can loosely tent it with aluminum foil for the remainder of the baking time.
Step 8: Cool and Enjoy!
Once baked, remove the loaf pan from the oven and let it cool in the pan on a wire rack for about 10-15 minutes. This allows the bread to set and makes it easier to remove. After 10-15 minutes, carefully lift the bread out of the pan (using the parchment paper overhang if you used it) and place it directly on the wire rack to cool completely before slicing. Slicing warm bread is tempting, but waiting ensures clean slices and a better texture. Enjoy your homemade, sugar-free banana bread!
Tips & Tricks for Banana Bread Success
Even with an easy recipe, a few extra tips can elevate your baking from good to great. Here’s some actionable advice:
- The Bananas Are Key: Seriously, don’t skimp on ripeness! Use bananas that are very spotted or even completely brown. They provide natural sweetness and a much deeper banana flavor. If your bananas aren’t ripe enough, you can speed up the process by baking them on a baking sheet at 300°F (150°C) for 15-30 minutes until their peels are black. Let them cool before mashing.
- Don’t Overmix the Batter: We mentioned it in the instructions, but it bears repeating! Overmixing develops gluten, which leads to a tough, dense banana bread. Mix just until the dry ingredients are incorporated, and a few lumps are perfectly fine.
- Measure Flour Correctly: Always spoon and level your flour. Scooping directly from the bag can add up to 25% more flour than needed, resulting in a dry, crumbly loaf.
- Adjust Sweetness to Taste: Different sugar substitutes have varying sweetness levels. If you prefer a sweeter bread, you can add a tablespoon or two more of your chosen substitute. Always taste your mashed banana mixture before adding dry ingredients (without the raw egg, of course!) to gauge sweetness.
- Storage for Freshness: Store leftover banana bread in an airtight container at room temperature for up to 3 days, or in the refrigerator for up to a week. For longer storage, slice the bread and freeze individual slices in an airtight bag or container for up to 3 months. Thaw at room temperature or warm gently in the microwave.
- Customize Your Loaf: Feel free to add other sugar-free mix-ins like sugar-free chocolate chips, shredded unsweetened coconut, or a different type of nut. Just remember these additions will alter the nutritional information.
Essential Baking Tools for Your Kitchen
Having the right tools makes baking much easier and more enjoyable, especially for beginners. Here are some essentials you might need:
- Mixing Bowl
- Whisk
- Baking Pan (9×5 inch loaf pan)
- Measuring Cups
- Spatula
- Measuring Spoons
- Wire Rack (for cooling)
Nutrition Information (Per Serving)
Here’s an estimated nutritional breakdown for one slice (assuming 12 slices per loaf) of your Sugar-Free Banana Bread. Please note that these are approximate values and can vary based on specific ingredient brands and preparation methods, especially the type of sugar substitute used.
| Nutrient | Amount |
|---|---|
| Calories | 180 kcal |
| Carbohydrates | 25 g |
| Protein | 3 g |
| Fat | 9 g |
| Fiber | 2 g |
| Sugars (natural) | 7 g |
Frequently Asked Questions for Beginner Bakers
Got questions? We’ve got answers! Here are some common queries that beginners often have about making banana bread:
-
Q: Can I use yellow bananas instead of very ripe ones?
-
A: While you *can* use yellow bananas, we highly recommend using very ripe ones (with lots of brown spots). Riper bananas are naturally sweeter, more aromatic, and easier to mash, which significantly contributes to the flavor and moisture of your banana bread. Under-ripe bananas will result in a less flavorful and potentially drier loaf.
-
Q: My banana bread turned out dry. What went wrong?
-
A: A dry banana bread is often a sign of one of two things: either you added too much flour (remember to spoon and level!) or you overbaked it. Make sure to check for doneness with a toothpick and remove it from the oven as soon as it passes the test. An accurate oven thermometer can also help ensure your oven isn’t running too hot.
-
Q: Can I add other mix-ins to this recipe?
-
A: Absolutely! This recipe is very forgiving and great for customization. You can add 1/2 cup of sugar-free chocolate chips, shredded unsweetened coconut, or even a different type of nut like pecans or macadamia nuts. Just fold them in during Step 5. Keep in mind that these additions will slightly change the nutritional information.
-
Q: How should I store my homemade banana bread?
-
A: For optimal freshness, store your banana bread in an airtight container at room temperature for up to 3 days. If you want it to last longer, you can store it in the refrigerator for up to a week. Banana bread also freezes beautifully! Wrap individual slices tightly in plastic wrap and then place them in a freezer-safe bag or container for up to 3 months. Thaw at room temperature or gently warm in the microwave.
-
Q: How do I know when my banana bread is perfectly baked?
-
A: The best way to check for doneness is the “toothpick test.” Insert a wooden skewer or toothpick into the very center of the loaf. If it comes out clean or with just a few moist crumbs attached, your bread is done. If it comes out with wet batter, continue baking in 5-10 minute increments until it passes the test. Don’t be afraid to check multiple spots!
Ready to Bake Your Own Sugar-Free Banana Bread?
Congratulations, you’re now equipped with everything you need to bake a truly delicious and healthy loaf of Sugar Free Banana Bread! We hope this detailed, beginner-friendly guide makes your first (or fiftieth) baking experience a resounding success. Remember, baking is a journey, and every loaf is a step towards becoming a more confident baker. Don’t be afraid to experiment and make this recipe your own.
So, grab those ripe bananas and get baking! We can’t wait to hear how your bread turns out. Share your creations and tag us on social media!
“`