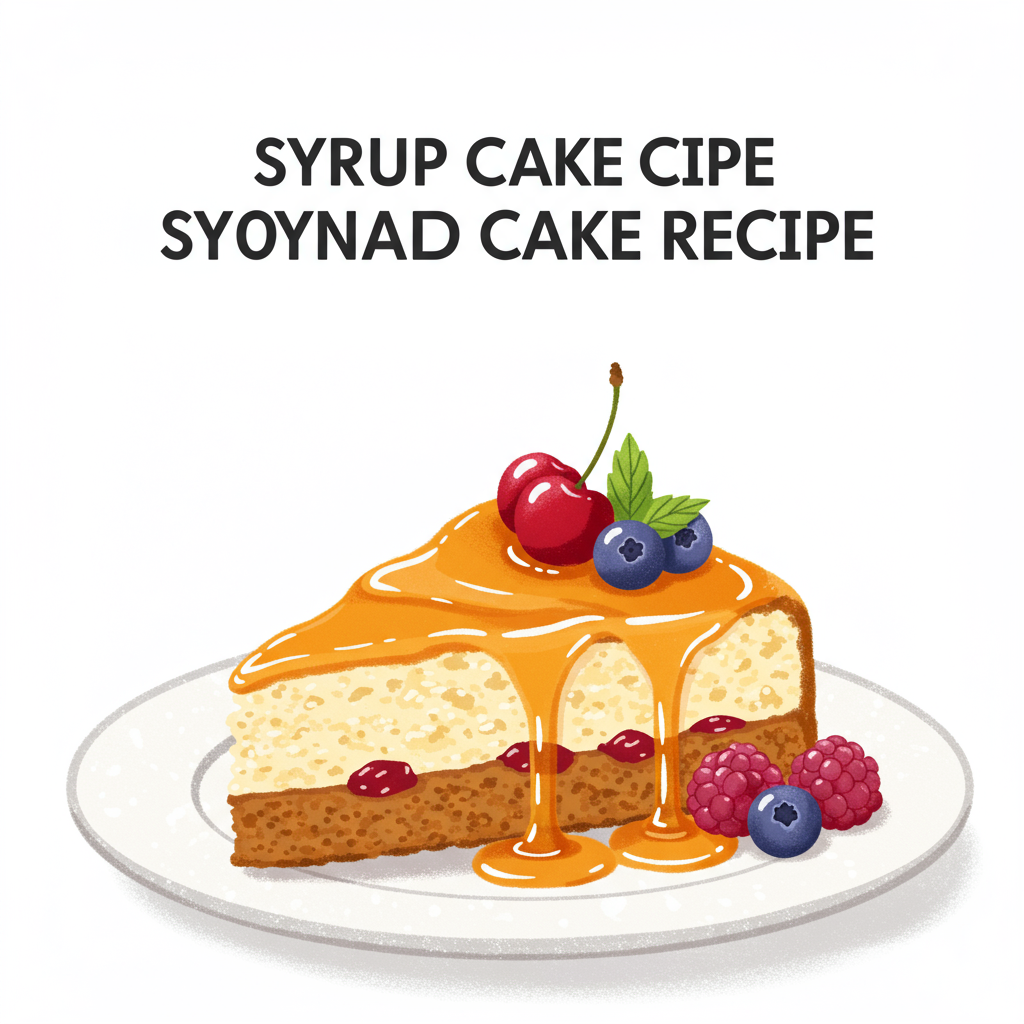
Are you ready to dive into the wonderful world of baking but feel a little intimidated? Fear not, because this Syrup Cake Recipe is your perfect starting point! This delightful cake is incredibly moist, wonderfully sweet, and surprisingly simple to master, even if you’ve never baked anything from scratch before. We’ve designed this guide to be one of the most easy baking recipes you’ll ever encounter, packed with all the baking tips for beginners you need to succeed.
Imagine a tender, fluffy cake drenched in a warm, sweet syrup that seeps into every pore, creating an irresistible texture and flavor. It’s comforting, satisfying, and absolutely addictive! Forget complicated techniques; we’ll walk you through each step with clear instructions and helpful advice, ensuring your first foray into baking is a resounding success. Get ready to impress yourself and everyone around you with this heavenly dessert!
Essential Ingredients for Your Syrup Cake
Gathering your ingredients is the first exciting step! Make sure you have everything measured out and ready to go before you begin. This is called “mise en place” and it makes the baking process much smoother.
For the Moist Cake Batter:
| Ingredient | Quantity | Unit |
|---|---|---|
| All-Purpose Flour | 2 ½ | cups |
| Granulated Sugar | 1 ½ | cups |
| Baking Powder | 2 | teaspoons |
| Salt | ½ | teaspoon |
| Large Eggs | 3 | |
| Whole Milk | 1 | cup |
| Vegetable Oil (or melted unsalted butter) | ½ | cup |
| Vanilla Extract | 1 | teaspoon |
For the Irresistible Sweet Syrup:
| Ingredient | Quantity | Unit |
|---|---|---|
| Granulated Sugar | 1 ½ | cups |
| Water | 1 ½ | cups |
| Lemon Juice (freshly squeezed, optional but recommended for brightness) | 1 | tablespoon |
| Vanilla Extract (optional) | ½ | teaspoon |
Step-by-Step Instructions: Bake Your Perfect Syrup Cake
Follow these detailed steps carefully, and you’ll have a gorgeous, delicious syrup cake in no time. Remember, baking is all about precision and patience!
Step 1: Get Ready – Preheat and Prepare Your Pan
- Preheat your oven: Set your oven to 350°F (175°C). It’s important to give your oven enough time to reach and maintain the correct temperature. A common beginner mistake is putting the cake in a cold oven.
- Prepare your baking pan: Lightly grease a 9×13 inch (23×33 cm) baking pan with butter or baking spray. Then, dust it with a little flour, tapping out any excess. This creates a non-stick surface. For extra assurance, you can line the bottom with parchment paper after greasing, then grease and flour the parchment too! This makes removing the cake much easier.
Step 2: Mix the Dry Ingredients
- In a large mixing bowl, whisk together your 2 ½ cups of all-purpose flour, 1 ½ cups of granulated sugar, 2 teaspoons of baking powder, and ½ teaspoon of salt. Whisking ensures these ingredients are evenly distributed, which is crucial for a consistent cake texture.
Step 3: Combine the Wet Ingredients
- In a separate medium bowl, whisk together the 3 large eggs, 1 cup of whole milk, ½ cup of vegetable oil (or melted butter), and 1 teaspoon of vanilla extract. Make sure your eggs and milk are at room temperature. This helps them combine more easily with other ingredients and creates a smoother, more uniform batter. If they’re cold, pop them in warm water for a few minutes.
Step 4: Combine Wet and Dry Ingredients
- Pour the wet ingredients mixture into the bowl with your dry ingredients. Using a whisk or a rubber spatula, mix until just combined. It’s really important not to overmix! Overmixing develops the gluten in the flour too much, which can lead to a tough, dense cake instead of a light and fluffy one. A few lumps are perfectly fine; they’ll usually bake out.
Step 5: Bake Your Cake
- Pour the cake batter evenly into your prepared 9×13 inch baking pan.
- Bake for 30-35 minutes, or until a wooden skewer or toothpick inserted into the center of the cake comes out clean. Every oven is different, so start checking around the 30-minute mark. If it’s still wet, bake for a few more minutes.
- Once baked, remove the cake from the oven and place it on a wire rack. Don’t remove it from the pan yet!
Step 6: Prepare the Sweet Syrup
- While the cake is baking, or immediately after it comes out of the oven, prepare the syrup. In a medium saucepan, combine 1 ½ cups of granulated sugar and 1 ½ cups of water.
- Bring the mixture to a boil over medium-high heat, stirring occasionally to dissolve the sugar. Once boiling, reduce the heat to low and let it simmer for 5-7 minutes. You want it to thicken slightly, but not become too syrupy or sticky.
- Remove from heat and stir in the 1 tablespoon of lemon juice (if using) and ½ teaspoon of vanilla extract (if using). The lemon juice adds a lovely bright counterpoint to the sweetness.
Step 7: Drench Your Cake in Syrup
- While the cake is still warm (but not piping hot, about 5-10 minutes out of the oven) and the syrup is also warm, use a wooden skewer or the tines of a fork to poke holes all over the top of the cake. Make sure these holes go about halfway down into the cake, but don’t go all the way through to the bottom. These holes are essential for the syrup to penetrate deeply.
- Slowly and evenly pour the warm syrup over the warm cake, allowing it to soak into the holes. Take your time, pouring a little at a time and letting it absorb before adding more. This might take a few minutes. The warm cake and warm syrup help with maximum absorption, making your cake incredibly moist.
Step 8: Cool and Serve
- Allow the cake to cool completely in the pan on the wire rack. This is a crucial step for the syrup to fully absorb and for the cake to set properly. Patience is key here!
- Once cooled, slice and serve. You can dust it with a little powdered sugar, or serve with a dollop of whipped cream or fresh berries for an extra touch. Enjoy your homemade, perfectly moist Syrup Cake!
Tips & Tricks for Beginner Bakers
Baking is a science, but also an art! Here are some golden nuggets of advice to ensure your Syrup Cake is a triumph every time:
- Room Temperature Ingredients are Your Best Friend: For eggs and milk, having them at room temperature (about 30 minutes out of the fridge) helps them emulsify better with other ingredients, creating a smoother, more uniform batter and a lighter cake texture.
- Measure Accurately: Baking is precise. Use proper measuring cups for dry ingredients (levelled with a straight edge) and liquid measuring cups for wet ingredients. For flour, spoon it into the measuring cup and then level it off – don’t scoop directly from the bag, as this can compact the flour and lead to too much being used.
- Don’t Overmix: This is a cardinal rule for cakes! Mix just until the ingredients are combined. Overmixing develops gluten, leading to a tough, chewy cake rather than a tender one.
- Use an Oven Thermometer: Oven temperatures can vary widely from what the dial says. An inexpensive oven thermometer will give you an accurate reading, preventing over or under-baking.
- Patience with Syrup Absorption: Don’t rush pouring the syrup. Let it slowly seep into the cake. The wait for the cake to cool completely is also essential for the best texture and flavor development.
- Flavor Variations: Feel free to experiment! Add a teaspoon of almond extract instead of vanilla, or a pinch of cinnamon to the cake batter. For the syrup, a strip of orange or lemon zest simmered in the syrup (removed before pouring) can add a delightful citrus aroma.
- Storage: Store your syrup cake covered at room temperature for up to 3 days, or in the refrigerator for up to 5 days. It actually tastes even better the next day as the flavors meld!
Essential Baking Tools You’ll Need
Having the right tools makes all the difference, especially when you’re starting out. Here are the basics that will set you up for success:
- Mixing Bowls (various sizes)
- Whisk
- 9×13 inch Baking Pan
- Measuring Cups and Spoons
- Rubber Spatula
- Wooden Skewer or Fork (for poking holes)
- Small Saucepan (for syrup)
- Wire Rack (for cooling)
Nutrition Information (Estimated Per Serving)
Please note, these values are approximate and can vary based on specific ingredient brands and portion sizes. This is an estimate for one slice, assuming 12 servings from a 9×13 inch cake.
| Nutrient | Amount |
|---|---|
| Calories | 380-420 kcal |
| Carbohydrates | 60-70 g |
| Protein | 4-6 g |
| Fat | 12-16 g |
| Fiber | 1-2 g |
| Sugar | 40-50 g |
Frequently Asked Questions (FAQs)
New to baking? No problem! Here are some common questions beginners often ask about this recipe:
Q1: Can I make this cake ahead of time?
A: Absolutely! This syrup cake is fantastic for making ahead. In fact, many people find it tastes even better the next day after the syrup has had more time to fully infuse the cake. Store it covered at room temperature or in the refrigerator.
Q2: How do I know if my cake is perfectly baked?
A: The best way is the “toothpick test.” Insert a wooden skewer or toothpick into the center of the cake. If it comes out clean (without any wet batter clinging to it), your cake is done. If it has wet crumbs, bake for a few more minutes and test again.
Q3: My cake turned out dry. What went wrong?
A: A dry cake is usually a sign of overbaking. Keep a close eye on your baking time and trust the toothpick test. It could also be from overmixing the batter, which develops too much gluten, making the cake tough and dry. Make sure to measure flour correctly (spoon and level, don’t scoop).
Q4: Can I use a different type of milk or oil?
A: For best results, we recommend whole milk as its fat content contributes to a moist cake. You can use 2% milk, but the texture might be slightly less rich. For oil, vegetable oil or canola oil are neutral and work well. Melted unsalted butter is also a great choice for flavor, just ensure it’s cooled slightly before adding to wet ingredients.
Q5: What if I don’t have a 9×13 inch pan? Can I use a different size?
A: You can, but you’ll need to adjust baking time. A 9-inch round pan (you’d likely need two for this recipe quantity) or an 8×8 inch pan will result in a much thicker cake and require significantly longer baking time (and potentially overflow). For beginners, sticking to the specified pan size is highly recommended.
Q6: Can I add spices or zest to the cake batter itself?
A: Yes, absolutely! Feel free to add ½ teaspoon of ground cinnamon, a ¼ teaspoon of nutmeg, or the zest of one lemon or orange to the dry ingredients for an extra layer of flavor. This is a great way to personalize your cake!
Conclusion: Your Delicious Journey Awaits!
Congratulations, future baker! You’ve just unlocked the secret to a truly delightful and incredibly easy dessert. This Syrup Cake Recipe** is more than just a cake; it’s an invitation to experience the joy and satisfaction of creating something wonderful with your own hands. From the simple ingredients to the clear, step-by-step instructions, we’ve made sure this journey is as smooth and sweet as the cake itself.
Don’t be afraid to try it, even if it’s your very first time baking. Embrace the process, enjoy the aromas filling your kitchen, and savor every single moist, sweet bite. We’re confident that this will become one of your go-to **easy baking recipes**, a testament to your newfound baking skills. Happy baking, and don’t forget to share your creations with us!
“`