Unlock the Magic of New Year’s with Our Easy Vasilopita Bread Recipe!
Unlock the Magic of New Year’s with Our Easy Vasilopita Bread Recipe!
Welcome, aspiring bakers! Are you ready to dive into a beautiful tradition and bake something truly special? Our **Vasilopita Bread Recipe** is not just any bread; it’s a symbolic sweet loaf, often baked for New Year’s Day in Greece and other Balkan countries, containing a hidden coin that promises good luck to its finder. Don’t be intimidated if you’re new to baking; this guide is packed with **easy baking recipes** principles and specific **baking tips for beginners** to ensure your success. We’ll walk you through every step, transforming what might seem like a complex process into a joyful and rewarding experience. Get ready to fill your home with the incredible aromas of orange, mahlab, and freshly baked bread!
Making Vasilopita is a wonderful way to connect with a rich cultural heritage and create lasting memories with family and friends. This recipe is designed to be as clear and straightforward as possible, breaking down each stage into manageable tasks. So, tie on your apron, gather your ingredients, and let’s create a delicious, lucky Vasilopita together!
Gather Your Good Luck: Vasilopita Ingredients List
Before we begin our baking adventure, let’s make sure you have all the necessary ingredients. Using room temperature ingredients is key for successful bread making, so take out your butter, eggs, and milk a couple of hours before you start!
| Ingredient | Quantity | Unit |
|---|---|---|
| Whole Milk | 1 | cup |
| Granulated Sugar (for milk) | 1 | tablespoon |
| Active Dry Yeast | 2 ¼ | teaspoons (1 packet) |
| All-Purpose Flour | 4 ½ – 5 | cups |
| Granulated Sugar (for dough) | ¾ | cup |
| Unsalted Butter, softened | ½ | cup (1 stick) |
| Large Eggs | 2 | |
| Orange Zest | 1 | tablespoon (from 1 large orange) |
| Mahlab (ground cherry kernel) | 1 ½ | teaspoons |
| Mastic (ground, optional) | ¼ | teaspoon |
| Salt | 1 | teaspoon |
| Egg Yolk (for egg wash) | 1 | |
| Milk (for egg wash) | 1 | tablespoon |
| Sesame Seeds or Almond Slivers (for garnish) | 2 | tablespoons |
| Clean Coin (wrapped in foil) | 1 |
Your Journey to a Perfect Vasilopita: Step-by-Step Guide
Follow these detailed instructions carefully, and you’ll be amazed at what you can create. Remember, baking is a science, but also an art, so enjoy the process!
Step 1: Activate the Yeast (The Foundation of Your Bread)
- Warm the Milk: In a small saucepan or microwave-safe bowl, gently warm the 1 cup of whole milk until it’s lukewarm (about 105-115°F or 40-46°C). It should feel warm to the touch, like a baby’s bathwater, but not hot. If it’s too hot, it will kill the yeast; too cold, and the yeast won’t activate.
- Add Sugar and Yeast: Pour the warmed milk into a large mixing bowl (or the bowl of your stand mixer). Stir in 1 tablespoon of granulated sugar, then sprinkle the 2 ¼ teaspoons of active dry yeast over the top.
- Let it Bloom: Let the mixture sit undisturbed for 5-10 minutes. You should see a foamy, frothy layer form on the surface. This means your yeast is active and ready to work its magic! If it doesn’t foam, your yeast might be old, or the milk was too hot/cold, and you’ll need to start this step over. Don’t worry, it happens to the best of us!
Step 2: Prepare the Dough (Bringing it All Together)
- Combine Wet Ingredients: To the foamy yeast mixture, add the ¾ cup of granulated sugar, ½ cup softened unsalted butter, 2 large eggs, 1 tablespoon orange zest, 1 ½ teaspoons mahlab, ¼ teaspoon ground mastic (if using), and 1 teaspoon salt. Mix everything together with a whisk or a rubber spatula until well combined. The mixture might look a bit lumpy from the butter, which is fine.
- Add Flour Gradually: Begin adding the all-purpose flour, about 1 cup at a time, mixing after each addition. If using a stand mixer, use the dough hook attachment on low speed. If mixing by hand, use a sturdy wooden spoon.
- Form the Dough: Continue adding flour until the dough comes together and starts to pull away from the sides of the bowl. It should be soft, slightly sticky, but manageable. You might not need all 5 cups of flour, or you might need a tiny bit more – adjust based on how your dough feels. **Beginner Tip:** Resist the urge to add too much flour too quickly; a slightly sticky dough is often better for a soft bread.
Step 3: Knead the Dough (Developing the Gluten)
- Knead by Hand: If kneading by hand, turn the dough out onto a lightly floured surface. Knead for 8-10 minutes. To knead, push the dough away from you with the heels of your hands, fold it back over, turn it a quarter turn, and repeat. You’re looking for a smooth, elastic dough that springs back when gently poked.
- Knead with a Stand Mixer: If using a stand mixer, let the dough hook knead on medium-low speed for 6-8 minutes. The dough should become smooth and elastic, clinging to the hook but clearing the sides of the bowl.
- Test for Readiness: A good way to test if your dough is kneaded enough is the “windowpane test.” Pinch off a small piece of dough and gently stretch it. If you can stretch it thin enough to see light through it without tearing, your dough is ready!
Step 4: First Rise (Proofing for Flavor and Texture)
- Prepare for Rising: Lightly grease a clean large bowl with a little oil (vegetable, canola, or olive oil works). Place the kneaded dough in the bowl, turning it once to coat the entire surface with oil. This prevents it from drying out.
- Cover and Rise: Cover the bowl tightly with plastic wrap or a clean kitchen towel. Place it in a warm, draft-free spot. A slightly warm oven (turned off, with just the light on) or a sunny spot on your counter works well.
- First Proof: Let the dough rise for 1-1.5 hours, or until it has doubled in size. **Beginner Tip:** Don’t rush this step! The longer and slower the rise (within reason), the more flavor your bread will develop. If your kitchen is cool, it might take a bit longer.
Step 5: Shape the Vasilopita and Insert the Coin
- Prepare Baking Pan: Lightly grease a 9 or 10-inch round baking pan (a springform pan works great, too, but ensure it’s sealed for no leaks). You can also line it with parchment paper for easy removal.
- Deflate and Shape: Once the dough has doubled, gently punch it down to release the air. Turn it out onto a lightly floured surface and briefly knead it a few times to redistribute the yeast.
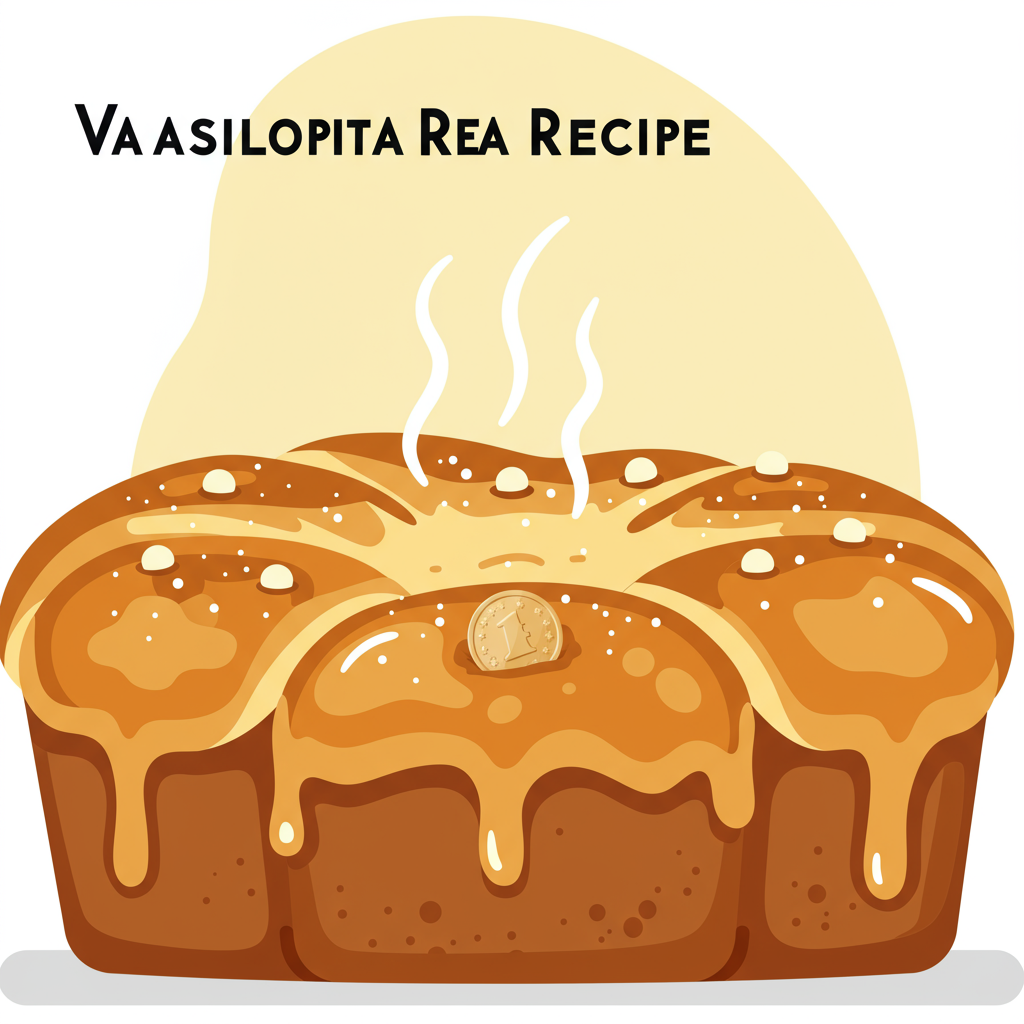
- Insert the Coin: Take your clean, foil-wrapped coin. Flatten the dough into a thick disk, then insert the coin from the bottom or side, ensuring it’s completely hidden and won’t poke through the top. Reshape the dough back into a neat, round loaf. **Important:** Make sure the coin is securely embedded and won’t be easily visible or fall out during baking or slicing.
- Place in Pan: Carefully transfer the shaped dough into your prepared baking pan.
Step 6: Second Rise (Final Proof)
- Cover and Rise Again: Cover the pan loosely with plastic wrap or a clean kitchen towel. Place it back in a warm, draft-free spot.
- Second Proof: Let the dough rise for another 45-60 minutes, or until it looks visibly puffy and almost doubled in size again. It should look light and airy. While it’s rising, preheat your oven.
Step 7: Bake Your Vasilopita
- Preheat Oven: Preheat your oven to 350°F (175°C). Ensure your oven is fully preheated before putting the bread in for even baking.
- Prepare Egg Wash: In a small bowl, whisk together the 1 egg yolk and 1 tablespoon of milk until smooth. This egg wash will give your Vasilopita a beautiful golden-brown, shiny crust.
- Brush and Garnish: Gently brush the top of the risen dough with the egg wash. Be careful not to deflate the dough. Sprinkle with sesame seeds or almond slivers, if desired. You can also form the year “2024” (or the current year) on top with almond slivers or by lightly scoring the dough before baking.
- Bake: Place the pan in the preheated oven. Bake for 35-45 minutes, or until the Vasilopita is deep golden brown on top and sounds hollow when tapped on the bottom. If it starts to brown too quickly, you can loosely tent it with aluminum foil for the last 10-15 minutes of baking.
- Check for Doneness: The internal temperature of a fully baked bread should be around 200-210°F (93-99°C) when measured with an instant-read thermometer.
Step 8: Cool and Serve
- Cooling Rack: Once baked, immediately remove the Vasilopita from the oven. Let it cool in the pan for about 10-15 minutes, then carefully transfer it to a wire cooling rack to cool completely. This prevents the bottom from becoming soggy.
- Traditional Serving: Traditionally, on New Year’s Day, the Vasilopita is cut into slices. The first slice is for Christ, the second for the Virgin Mary, the third for St. Basil, and then for family members and guests, usually in order of age or importance. The person who finds the coin is said to have good luck for the entire year!
- Enjoy! Slice and serve your beautiful, lucky Vasilopita.
Vasilopita Success Secrets: Pro Tips for Beginners
Baking bread can feel like a delicate dance, but with these tips, you’ll master your Vasilopita in no time!
- Room Temperature is Your Friend: Always ensure your milk, butter, and eggs are at room temperature. Cold ingredients can shock the yeast and prevent proper rising, leading to a dense loaf. Take them out of the fridge at least an hour or two before you start.
- Don’t Rush the Rise: Proofing (rising) is crucial. If your kitchen is cool, find a warm, draft-free spot. A slightly warm (but turned off!) oven with the light on is a perfect environment. Patience here will reward you with a light, airy texture. If your dough isn’t rising, it might be too cold, or your yeast wasn’t active.
- Measure Accurately: Especially with flour, use the “spoon and level” method. Spoon flour into your measuring cup and then level it off with a straight edge. Don’t scoop directly from the bag, as this compacts the flour and you’ll end up with too much, leading to a dry, dense bread.
- Trust Your Dough: Feel the dough. It should be soft and elastic, not overly sticky or dry. Adjust flour by the tablespoon if needed. The “windowpane test” is your best friend for knowing when it’s sufficiently kneaded.
- Oven Calibration: Ovens can vary. If your bread is browning too quickly or slowly, consider getting an oven thermometer to ensure your oven is truly at the temperature you set.
- The Coin’s Journey: Wrap your coin securely in aluminum foil to keep it clean and prevent any metallic taste transfer. Ensure it’s deep enough in the dough so it doesn’t poke out during baking, but not so deep that it’s impossible to find!
- Decorating Fun: Get creative with the top! You can simply brush with egg wash, sprinkle with sesame seeds or slivered almonds, or even use a knife to lightly score the year “2024” (or the current year) into the dough before the egg wash and baking.
Your Baking Arsenal: Essential Tools for Vasilopita
Having the right tools makes all the difference in your baking journey. Here are a few essentials for making your Vasilopita:
- Mixing Bowl (large, for dough and rising)
- Whisk (for combining wet ingredients and egg wash)
- Baking Pan (9 or 10-inch round, springform or regular)
- Measuring Cups and Measuring Spoons (for accurate ingredient amounts)
- Spatula (rubber or silicone for mixing and scraping)
- Wire Cooling Rack (essential for preventing a soggy bottom)
- Kitchen Scale (optional, but highly recommended for precise flour measurement)
- Stand Mixer with Dough Hook (optional, but a great time-saver for kneading)
Nourishment & Tradition: Vasilopita Nutrition Facts (Estimated Per Serving)
Please note that these are estimated nutritional values per serving and can vary based on specific ingredient brands, exact measurements, and serving size. This recipe yields approximately 12-16 servings.
| Nutrient | Per Serving (Estimate) |
|---|---|
| Calories | 280-350 kcal |
| Carbohydrates | 45-55 g |
| Protein | 7-9 g |
| Fat | 9-12 g |
| Fiber | 1-2 g |
| Sugar | 15-20 g |
Baking Vasilopita: Your Questions Answered!
Q1: My dough isn’t rising! What went wrong?
A: The most common culprit is inactive yeast or improper water/milk temperature. Ensure your milk is lukewarm (105-115°F / 40-46°C) – not too hot, not too cold. Also, check the expiration date on your yeast. If your yeast didn’t foam in the first step, it likely wasn’t active. Ensure your rising spot is warm and draft-free.
Q2: Can I make Vasilopita ahead of time?
A: Yes! You can prepare the dough up to the first rise. After the first rise, punch down the dough, shape it, and place it in the prepared pan. Then, instead of a second rise, cover it tightly with plastic wrap and refrigerate overnight (up to 12-18 hours). The next morning, take it out, let it come to room temperature and complete its second rise (this might take 1.5-2 hours), then proceed with the egg wash, garnish, and baking.
Q3: What are Mahlab and Mastic, and can I omit them?
A: Mahlab is an aromatic spice made from the ground pits of St. Lucie cherries, giving a slightly nutty, floral, and cherry-like flavor. Mastic is a resin from the mastic tree, offering a unique pine-like, slightly sweet aroma. They are traditional to Vasilopita and contribute significantly to its authentic flavor profile. While you can omit them, the bread won’t have the same characteristic taste. You can find them in specialty spice stores or online.
Q4: How do I ensure the coin is safe to bake with?
A: Always use a clean coin. Wrap it securely in aluminum foil to prevent it from coming into direct contact with the dough and to ensure it’s hygienic. Make sure it’s completely enclosed so no foil bits detach during slicing. Some people even place the coin inside a small, heat-proof bag or wrap it in parchment paper before foil.
Q5: My bread turned out dense and heavy. What could be the reason?
A: This usually points to either too much flour, insufficient kneading, or not enough rising time. Remember to measure flour accurately (spoon and level), knead until the dough is elastic (passing the windowpane test), and allow ample time for both rises in a warm environment. A dense loaf can also result from yeast that wasn’t fully active.
Q6: Can I use instant yeast instead of active dry yeast?
A: Yes, you can! Instant yeast can often be mixed directly with the dry ingredients without proofing first. However, for a beginner-friendly recipe, proofing (activating) the yeast in warm milk is a great way to ensure your yeast is alive and active before committing to the full recipe. If you use instant yeast and skip the proofing, still ensure your milk is warm when added to the dough.
Your Vasilopita Masterpiece Awaits!
Congratulations, baker! You’ve just embarked on a wonderful culinary journey and are now equipped to create a beautiful, symbolic Vasilopita. This **Vasilopita Bread Recipe** is more than just a sweet bread; it’s a tradition, a wish for good fortune, and a delicious way to celebrate. Don’t worry if your first attempt isn’t absolutely perfect; every bake is a learning experience, and the joy of making something with your own hands is truly priceless.
We hope these **baking tips for beginners** have empowered you to confidently tackle this recipe. Share your Vasilopita creations with us, and may the finder of the coin have a year filled with immense luck and happiness! Happy baking, and a very Happy New Year!
“`