
Welcome, aspiring bakers and seasoned pros alike! Are you ready to fill your kitchen with the irresistible aroma of freshly baked bread, all while keeping it completely plant-based? If you’ve been searching for an easy baking recipes that delivers delicious results with minimal effort,
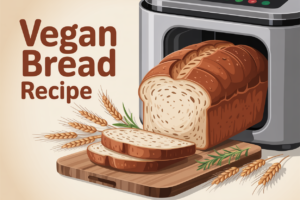
you’ve come to the right place. This Vegan Bread Recipe For Bread Machine is designed specifically for beginners, offering a straightforward path to perfect, fluffy, and tender vegan bread. Forget complicated kneading and proofing schedules – your bread machine will do all the heavy lifting! We’ll walk you through every step, sharing essential baking tips for beginners to ensure your first (and every subsequent) loaf is a resounding success. Get ready to enjoy the simple pleasure of homemade vegan bread!
Ingredients List
Gathering your ingredients is the first step to baking success. Here’s everything you’ll need for your delicious vegan bread, perfectly measured for your bread machine.
| Ingredient | Quantity | Unit |
|---|---|---|
| Warm Water (105-115°F / 40-46°C) | 1 1/4 | cups |
| Vegan Butter (melted or softened) OR Olive Oil | 2 | tablespoons |
| Granulated Sugar (or Agave Nectar) | 2 | tablespoons |
| Salt | 1 1/2 | teaspoons |
| All-Purpose Flour (or Bread Flour) | 3 | cups |
| Instant Yeast (RapidRise or Bread Machine Yeast) | 2 1/4 | teaspoons |
Step-by-Step Instructions: Baking Your Vegan Bread

Baking with a bread machine is incredibly simple, especially with this Vegan Bread Recipe For Bread Machine. Follow these detailed steps, and you’ll have a perfect loaf every time!
Step 1: Prepare Your Bread Machine Pan
First things first, make sure your bread machine pan is clean and the kneading paddle is securely in place at the bottom. This paddle is crucial for mixing and kneading your dough, so double-check it!
Step 2: Add Liquids First
This is a critical step for bread machine success! Pour the warm water into the bread machine pan. The temperature of the water is important – too cold and the yeast won’t activate, too hot and it will kill the yeast. Aim for a temperature that feels like a warm bath on your wrist. Next, add the melted vegan butter or olive oil. These liquids form the foundation of your dough.
Beginner Tip: Use a kitchen thermometer to check your water temperature. It removes all the guesswork and ensures your yeast is happy!
Step 3: Add Dry Ingredients (Except Yeast)
Carefully add the granulated sugar and salt to the pan. Try to keep the salt away from where the yeast will be added in a moment, as direct contact with salt can inhibit yeast activity. The sugar feeds the yeast, helping your bread rise beautifully, while the salt enhances flavor and controls yeast growth.
Common Mistake & Fix: Adding salt directly on top of yeast can kill it. Always create a barrier with flour or add salt to one side and yeast to the other.
Step 4: Add the Flour
Next, spoon the all-purpose flour evenly over the liquid ingredients. Don’t worry about mixing it yet; the bread machine will handle that. The flour creates a protective layer between the liquids/salt and the yeast, which we’ll add last.
Flour Choice: While all-purpose flour works great for a softer loaf, using bread flour will give you a chewier texture and often a slightly higher rise due to its higher protein content. Feel free to experiment!
Step 5: Add the Yeast Last
Finally, make a small indentation in the center of the flour, or just sprinkle the instant yeast directly on top of the flour layer. Make sure the yeast doesn’t touch the water or salt at this stage. Instant yeast is fantastic for bread machines because it doesn’t require prior proofing and activates quickly once mixed with liquids. Your ingredients are now perfectly layered!
Alternatives: If you only have active dry yeast, you can still use it, but it’s best to proof it first. Mix it with the warm water and a pinch of sugar for 5-10 minutes until foamy, then add this mixture as your liquid base. However, for true beginner-friendliness and bread machine ease, instant yeast is king!
Step 6: Select Your Bread Machine Setting
Place the pan securely back into your bread machine. Close the lid. Now, select the appropriate setting. For most bread machines, the “Basic” or “White Bread” cycle is perfect for this recipe. Choose your desired crust color – “Light” or “Medium” are usually good starting points for a golden-brown crust. Press start!
Bread Machine Cycles: These cycles typically include a preheat (optional), kneading, rising, and baking phases, all automatically timed. This is why bread machines are so amazing for busy bakers!
Step 7: Monitor the Dough During Kneading
During the first kneading cycle (usually within the first 10-15 minutes), briefly open the lid to check the dough’s consistency. It should form a smooth, elastic ball that cleans the sides of the pan. It shouldn’t be too sticky, nor too dry and crumbly.
- If the dough is too sticky: Add flour, one tablespoon at a time, allowing it to incorporate before adding more.
- If the dough is too dry or crumbly: Add warm water, one teaspoon at a time, until the dough comes together nicely.
This quick adjustment can make a huge difference in your final loaf’s texture and rise.
Step 8: Let the Bread Machine Do Its Magic
Once you’ve made any necessary adjustments, close the lid and let the bread machine complete its cycle. This typically takes 3-4 hours, depending on your machine and chosen setting. Resist the urge to open the lid during the rising and baking phases, as this can affect the loaf’s rise and internal temperature.
Step 9: Remove and Cool Your Bread
Once the cycle is complete and your kitchen smells incredible, carefully remove the bread pan from the machine using oven mitts. The pan will be very hot! Invert the pan onto a wire cooling rack and gently shake the loaf out. If the kneading paddle is stuck in the bottom of the loaf, carefully remove it with a utensil.
Cooling is Crucial: Allow the bread to cool completely on the wire rack for at least 1-2 hours before slicing. Slicing hot bread can make it gummy and dense inside. Patience is a virtue here!
Step 10: Slice and Enjoy!
Once fully cooled, slice your homemade vegan bread with a serrated knife and enjoy! It’s perfect for sandwiches, toast, or simply slathered with vegan butter. Congratulations, you’ve just baked a fantastic loaf of vegan bread!
Tips & Tricks for Perfect Vegan Bread Every Time
Even with a bread machine, a few extra tips can elevate your baking game and ensure consistent success with your Vegan Bread Recipe For Bread Machine.
- Measure Accurately: Baking is a science! Use proper measuring cups and spoons, and for flour, either spoon it into the cup and level it off or, even better, weigh it with a kitchen scale for ultimate precision (3 cups of all-purpose flour is roughly 360 grams).
- Check Yeast Freshness: Yeast is a living organism. If your yeast is old or expired, your bread won’t rise. You can test active dry yeast by dissolving it in warm water with a pinch of sugar; it should get foamy within 5-10 minutes. Instant yeast generally doesn’t require proofing.
- Ingredient Temperature Matters: Ensure your water is warm (105-115°F) but not hot. Cold water slows yeast activity, while hot water kills it. Room temperature ingredients (like flour and sugar) are also best.
- Don’t Peek Too Much: While it’s good to check the dough during the first knead, try to avoid opening the lid during the rising and baking cycles. Temperature fluctuations can cause the bread to deflate.
- Store Properly: Once cooled, store your bread in an airtight container or bread bag at room temperature for 3-4 days. For longer storage, slice and freeze it, then toast individual slices as needed.
- Experiment with Add-ins: Once you’re comfortable with the basic recipe, try adding a tablespoon of dried herbs (like rosemary or oregano) during the initial kneading phase for a savory loaf, or a handful of raisins for a sweeter bread!
Essential Baking Tools
Having the right tools makes baking even easier. Here are some essentials that will help you master this and other easy baking recipes:
- Mixing Bowl (for preparing other recipes or testing yeast)
- Whisk (useful for combining dry ingredients evenly)
- Baking Pan (not strictly needed for bread machine, but great for other baking adventures!)
- Measuring Cups & Spoons (essential for accurate ingredient amounts)
- Spatula (for scraping down bowls or removing stuck dough)
- Bread Machine: (The most essential tool for this recipe!)
- Kitchen Scale: (For precise flour measurement, highly recommended for serious bakers)
- Kitchen Thermometer: (For accurate water temperature, a game-changer for yeast recipes)
Nutrition Information (Per Slice, approx. 16 slices per loaf)
Please note: These are estimated values and can vary based on exact ingredients and portion sizes.
| Nutrient | Amount |
|---|---|
| Calories | 120-140 kcal |
| Carbohydrates | 25-30g |
| Protein | 4-5g |
| Fat | 2-3g |
| Fiber | 1-2g |
| Sugar | 2-3g |
Frequently Asked Questions (FAQs)
Q1: Why didn’t my bread rise in the bread machine?
A1: The most common culprits are inactive yeast (check the expiration date!), water that was too hot or too cold, or adding salt directly onto the yeast. Ensure your water is between 105-115°F and your yeast is fresh and kept separate from salt until kneading begins.
Q2: Can I use whole wheat flour instead of all-purpose flour?
A2: Yes, you can! However, whole wheat flour absorbs more liquid. You might need to increase the water by 1-2 tablespoons. Whole wheat flour also results in a denser loaf. For a first try, a 50/50 blend of whole wheat and all-purpose flour is a great compromise.
Q3: My dough is too sticky/dry during the kneading cycle. What should I do?
A3: This is a common adjustment! If it’s too sticky and clinging to the sides of the pan, add flour one tablespoon at a time until it forms a smooth ball. If it’s too dry and crumbly, add warm water one teaspoon at a time until it comes together. Make these adjustments during the first 10-15 minutes of kneading.
Q4: How should I store homemade bread?
A4: Once completely cooled, store your bread in an airtight container, a bread box, or a sealed plastic bag at room temperature for 3-4 days. For longer storage, slice the loaf and freeze the slices. You can then toast them directly from frozen.
Q5: Can I make this recipe without a bread machine?
A5: While this recipe is optimized for a bread machine, you can adapt it. You’d follow the same ingredient order in a large mixing bowl, then knead by hand for 8-10 minutes or with a stand mixer for 5-7 minutes. After kneading, let it rise in a greased bowl until doubled (1-1.5 hours), punch down, shape into a loaf, place in a loaf pan, and let it rise again until doubled (30-45 minutes). Bake at 375°F (190°C) for 30-35 minutes.
Q6: What can I serve with my homemade vegan bread?
A6: The possibilities are endless! Enjoy it with a spread of vegan butter, a drizzle of olive oil and balsamic vinegar, homemade jam, avocado toast, or as the perfect accompaniment to your favorite vegan soup or stew. It also makes fantastic sandwiches!
Conclusion: Enjoy Your Homemade Vegan Bread!
And there you have it! A perfectly baked, fluffy, and delicious loaf of vegan bread, made effortlessly in your bread machine. We hope this Vegan Bread Recipe For Bread Machine has shown you just how accessible and rewarding homemade baking can be, even for beginners. Don’t be afraid to experiment and make this recipe your own. Every loaf you bake is a step towards becoming a more confident baker. So go ahead, slice into that warm, aromatic bread, and savor the incredible taste of your own culinary creation. Happy baking!